

 VI

Claude and Claude Code MCP
Add the Proferex MCP server to Claude and Claude Code.
Add Proferex as a custom MCP connector in Claude on the web or desktop. Claude Code can use the same MCP connection, or you can add the MCP server in the terminal.
Add the Proferex MCP connector in Claude
- In Claude, open Settings → Connectors, click Add and choose Add custom connector.
- Enter
Proferexas the name and paste this address as the URL:
https://www.proferex.com/api/mcpCopy it exactly, including www. The address without www doesn't connect.
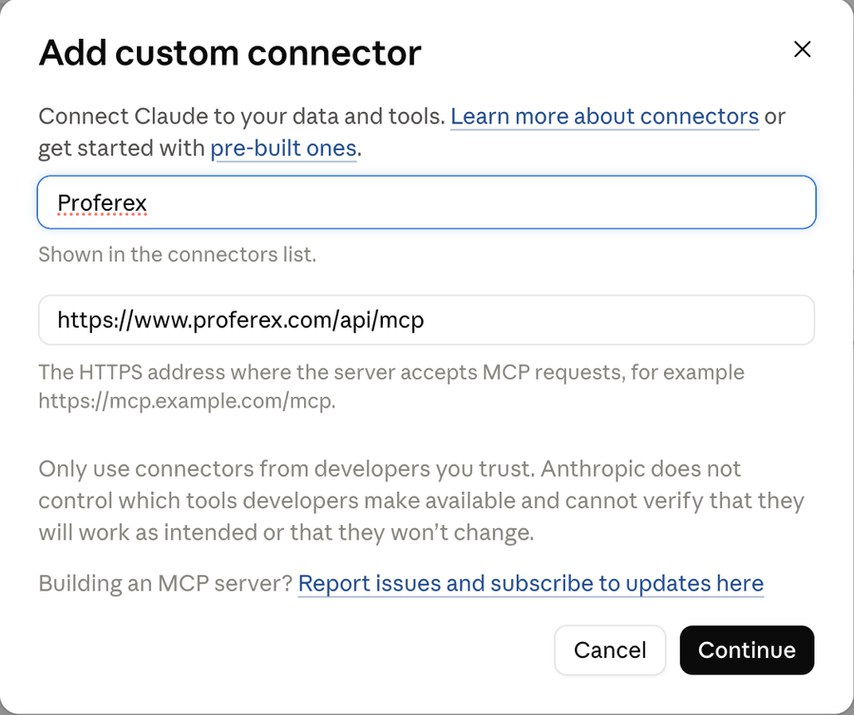
- Click Continue. Claude shows the sign-in settings it detected. Leave them as they are:
- Authentication: Sign in now
- OAuth client: Register automatically
- Request headers: none
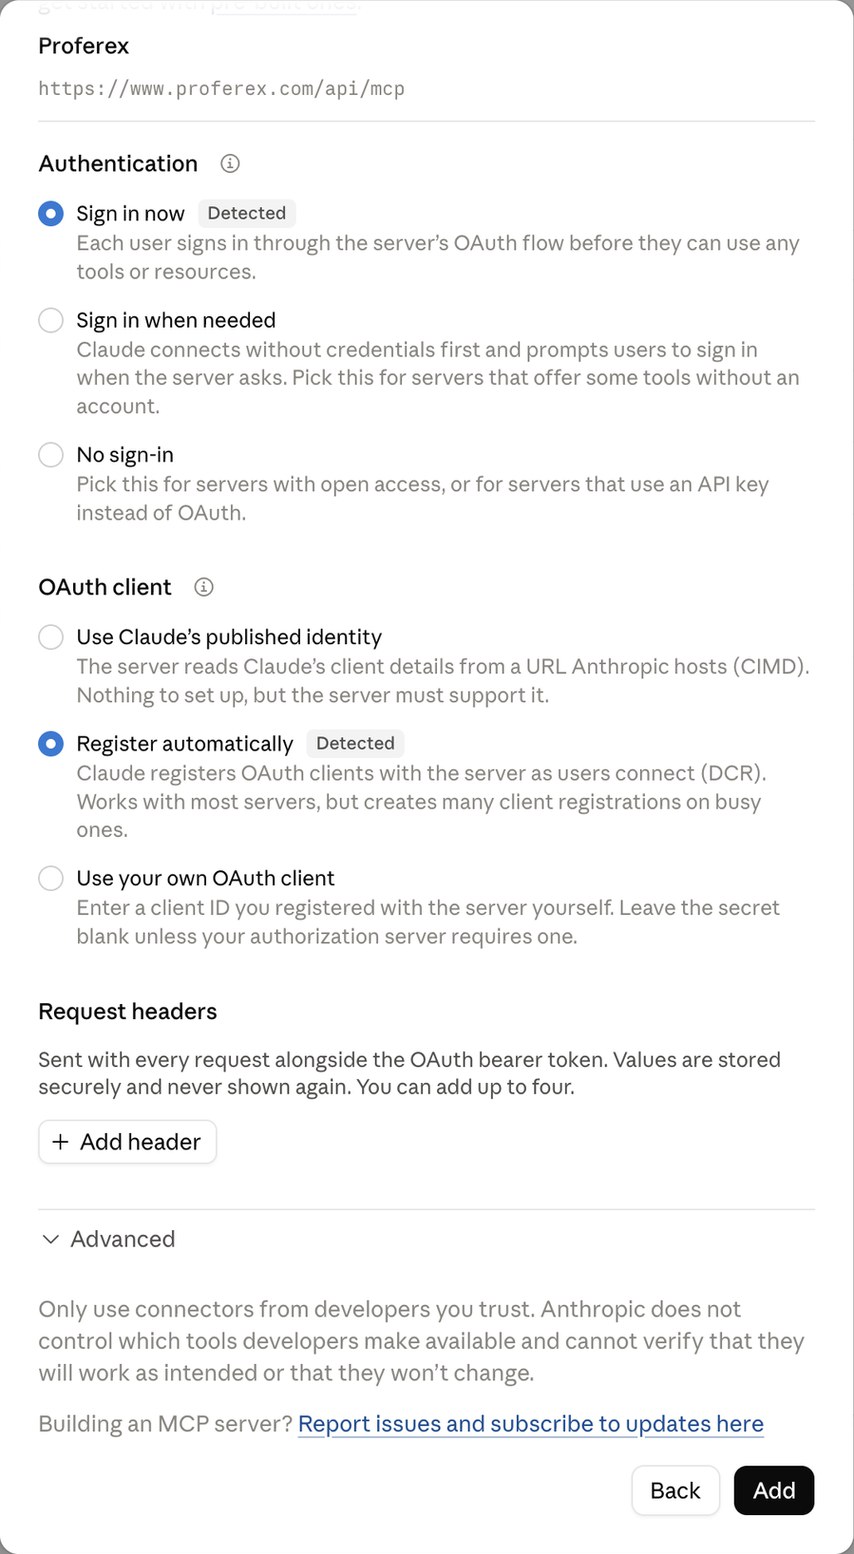
- Click Add, then Connect. Claude opens a Proferex page. Sign in if you are asked to.
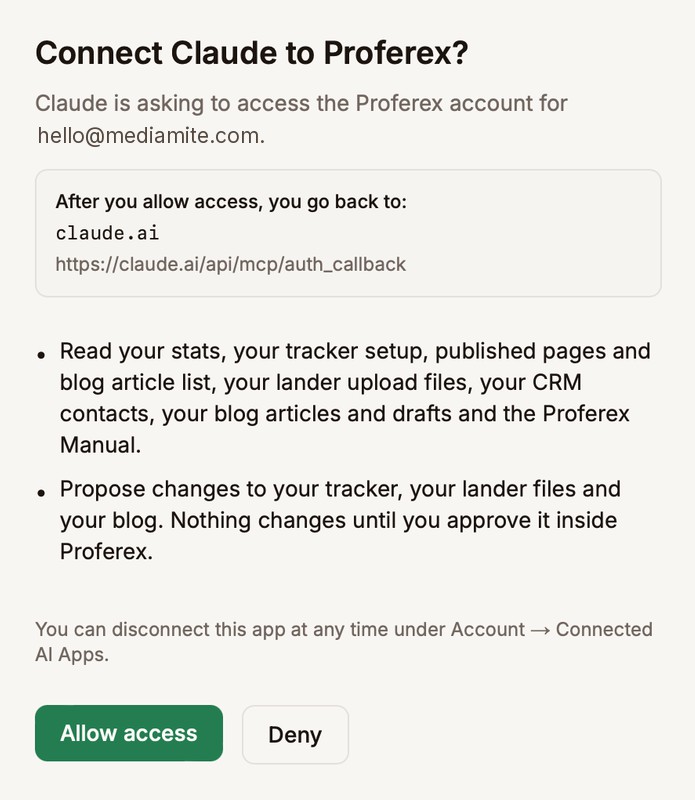
- Proferex shows Connect Claude to Proferex?, what Claude will be able to do, and the account it will connect to. Check that it's your account, then click Allow access. You go back to Claude, which is now connected.
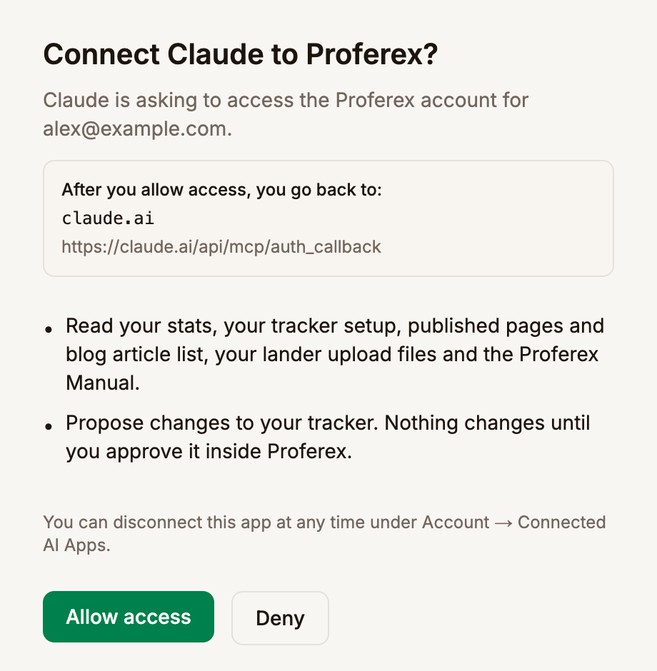
Click Deny instead if you didn't start the connection or the account is wrong.
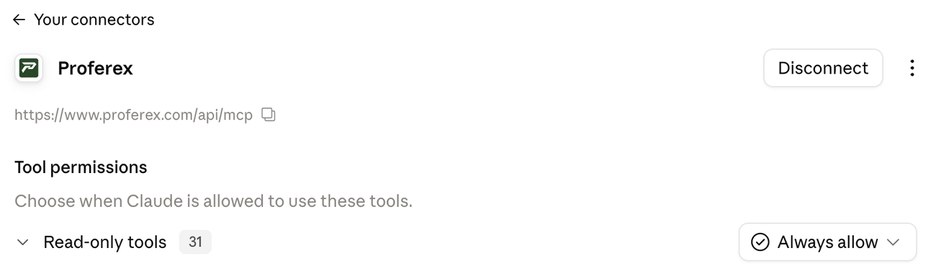
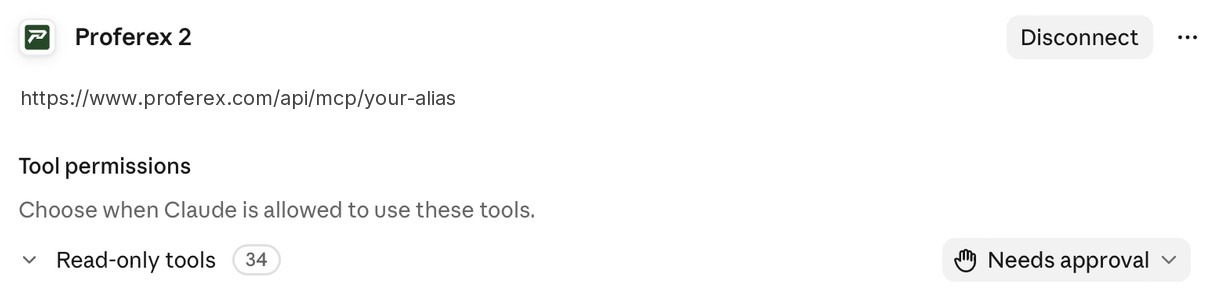
- Back in Settings → Connectors → Proferex, set Read-only tools to Always allow, so Claude doesn't stop to ask every time it looks up your stats. Leave Write/delete tools on Needs approval, so Claude checks with you before it proposes a change.
Ask Claude for a change
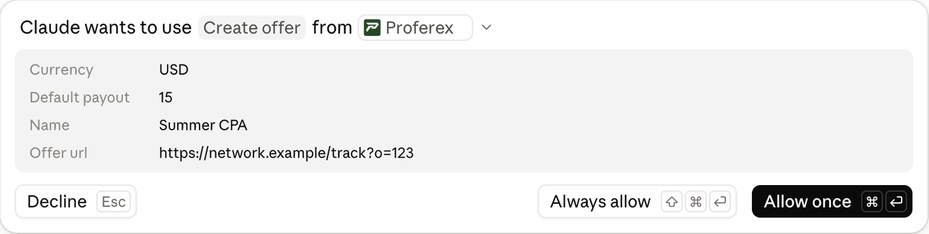
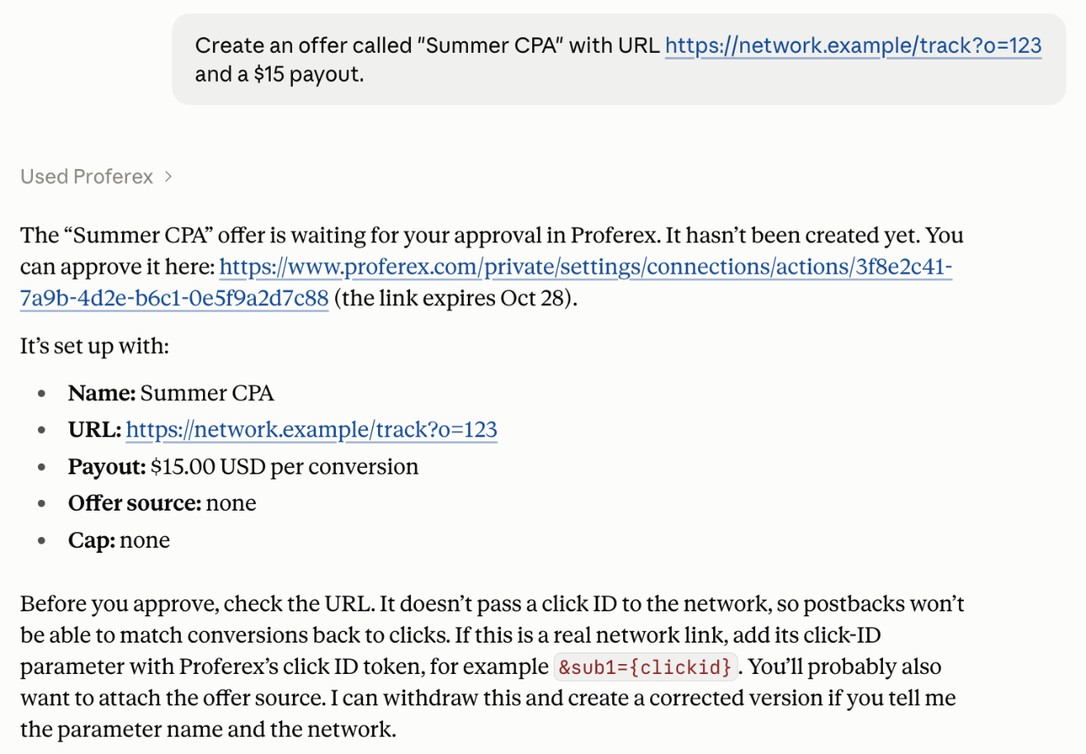
Claude asks before it sends a change. Click Allow once. The change then goes to Proferex for your approval. Nothing is created yet.
Add the Proferex MCP server in Claude Code
If you already connected Proferex in Claude on the web, Claude Code picks it up by itself when you sign in to Claude Code with the same Claude account. Type /mcp in Claude Code and look for claude.ai Proferex under claude.ai.
To add it to Claude Code on its own instead, run this in a terminal:
claude mcp add --transport http --scope user proferex https://www.proferex.com/api/mcp--scope user makes Proferex available in every project. Leave it out to add it to the current project only.
Start Claude Code with claude and type /mcp. If proferex needs signing in, choose it and follow the prompt. Your browser opens the Proferex page, asking Connect Claude Code to Proferex? Click Allow access, then go back to the terminal.
Use one or the other. If both are set up, Claude Code uses the one you added in the terminal and hides claude.ai Proferex while it's connected.
Connect more than one Proferex account
Running separate Proferex accounts, say one per brand or one per client? AI apps keep one sign-in per connector address, so give each account its own.
- In Proferex, sign in to the second account and open Account → Connected AI Apps. Copy the address marked This account only. It looks like this:
https://www.proferex.com/api/mcp/your-alias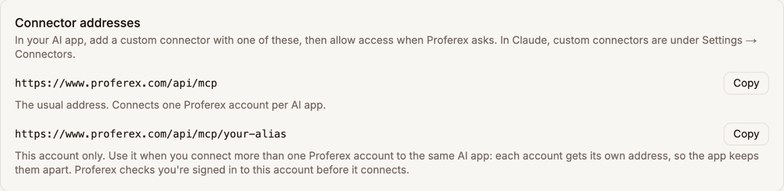
- In Claude, add a custom connector the same way as above, named after the account, with that address.
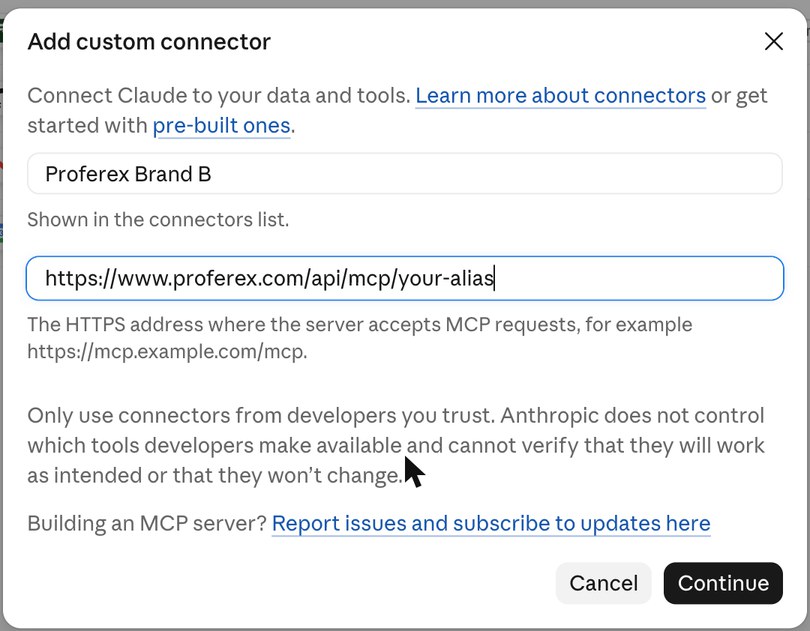
- Click Connect. The Proferex page names the account the connector will use. Check that it's the second account, then click Allow access. If your browser is signed in to a different Proferex account, the page says so and offers to switch.
- The new connector gets the full set of Proferex tools, so set its Read-only tools to Always allow as well.
Repeat for every account. Your first connector keeps working, whichever address it uses. When you ask Claude something, name the account you mean, or ask for all of them. Claude can use several connectors in one answer.

Claude Code takes the same address in the terminal:
claude mcp add --transport http --scope user proferex-brand https://www.proferex.com/api/mcp/your-aliasNext step
See Connect Your AI App with MCP for what your AI app can read and change, how to approve its changes in Proferex, and how to disconnect it.